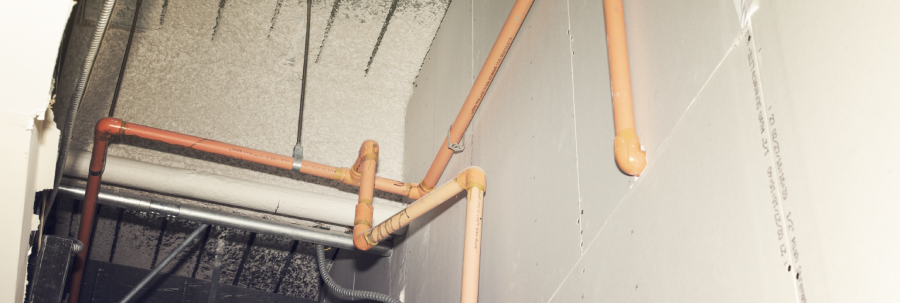

Most fire sprinkler systems will require modification at some point over their long lifetime of providing safety to people and protection for property.
Sprinkler heads, per code, must be changed sooner or later. A repair may be required. Or heads may need to be reconfigured. Consider, for example, an office building where the original system was installed to service a cubicle layout, but a new floor plan eliminates the cubicles in favor of a fixed-wall office configuration. That likely requires the sprinkler heads locations to be adjusted. A recent blog post describes just such a project at Lubrizol Advanced Materials’ PM Building in Brecksville, Ohio where a 30-year-old BlazeMaster® Fire Sprinkler System was reconfigured for a new office pattern.
In any of these situations it is vital to understand that pipe in existing systems is different than that in new systems. The pipe may have become more brittle – although still fully capable of providing good service – as it has aged or been exposed to heat over its service life. Here are six tips for installers to follow when modifying existing BlazeMaster CPVC sprinkler systems.
Best Practices for Installing BlazeMaster CPVC to Your Advantage
- To prevent cracking or damaging the existing pipe, always ensure that the sprinkler head adapter is held back by using a strap wrench or pipe wrench when unscrewing an existing sprinkler head. The brass components of the head and adapter will most likely have oxidized over time, potentially making them difficult to unscrew from each other. Holding back the adapter as described will usually make it easier to break the seal and reduce the possibility of the pipe snapping off.
- Always drain the system as well as can be accomplished. If possible, use a Drainvac system to remove moisture from the system. Evacuate the moisture as well as you can; if moisture exists when joints are solvent cemented later, moisture may drip into the joint, slowing cure time and potentially ruining the joint.
- The cut-in should be made on the smallest diameter pipe section in close proximity to the modification being made that can adequately supply the system changes. Use only a wheeled-tubing cutter or fine-toothed hacksaw when cutting into existing pipe; never use a ratchet cutter. A ratchet cutter is fine for new installations, but may compress pipe that has been in service. This could cause cracks in the pipe, some of which may be undetectable to the naked eye and potentially cause leaks once the system modifications have been made.
- Follow good installation practices. Carefully measure and cut the pipe square to the proper length and deburr, bevel and dry to ensure complete insertion during assembly. Check the dry fit of the components being joined. During assembly of the cut-in tee and other components, make a one-quarter turn when inserting the pipe into the fitting, particularly on 1-1/2” pipe sizes and larger. This may require the use of several components assembled in combination with the cut-in tee to create a short spool piece assembly. This may be done by using socket unions, flanges or grooved coupling adapters that will ensure a one-quarter turn can be obtained on all pipe connections being joined. Before applying the solvent cement, use a clean dry rag to wipe moisture and dirt from the fitting socket and pipe. Moisture on the joining surfaces will reduce joint integrity. Use proper cementing procedures with the understanding that cure times will be increased as compared to new installations. Please note: It is always best to use a new can of solvent cement.
Completing the Project
- Once all work is completed, the cut in joints must be allowed to cure properly prior to pressure testing; these are provided in the following table.
|
Cut-Ins Minimum Cure Prior to Pressure Testing |
|||
|
|
Ambient Temperature During Cure |
||
|
Pipe Size |
60°F to 120°F |
40°F to 95°F |
0°F to 39°F |
|
¾” |
1 hour |
4 hours |
48 hours |
|
1” |
1-1/2 hours |
4 hours |
48 hours |
|
1-1/4” & 1-1/2” |
3 hours |
32 hours |
10 days |
|
2” |
8 hours |
48 hours |
* |
|
2-1/2” & 3” |
24 hours |
32 hours |
* |
* Solvent cement can be applied at temperatures below 40°F for pipe 2” in size and larger, however the temperature of the system must be raised to 40°F or higher and allowed to cure per the above recommendations prior to pressure testing. When bringing cement, pipe or fittings in from the outside, be sure they are brought up to room temperature before using the 60°F to 120°F cure schedule.
- Once cure times are met, the work should be inspected for proper alignment and hanger placement prior to testing. Slowly fill the system with water and bleed the air from the furthest and highest sprinkler heads before test pressure is applied. Pressure test the portion of the sprinkler system containing the cut-in tee, sectioning off the system to its smallest area using floor valves, etc., to isolate the area prior to testing. This minimizes the potential for water damage should a leak occur. Warning: Air or compressed gas must never be used for pressure testing.
BlazeMaster CPVC pipe and fittings are widely available and we always recommend to read and follow our partner manufacturer’s installation instructions. Do you have a question about cut-ins to existing BlazeMaster CPVC fire protection systems? We’re here to help with technical advice and to help you do it right the first time. Don’t hesitate to contact us.