
CPVC installation is quick, easy, and cost-effective.
Installation of CPVC piping is done through a simple one-step joining system so no torches or heat-fusion techniques are needed. Additionally, because CPVC is lightweight, installations in hard-to-reach places are completed more easily.
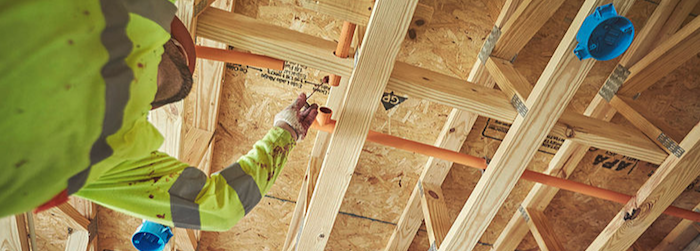
Whether you’ve used BlazeMaster® Pipe and Fittings before or if this is your first time, following best practices will ensure proper installation and a reliable, long-lasting fire sprinkler system.
The tips highlighted below do not replace the manufacturer’s installation instructions, but provide a list of helpful do’s and don’ts to keep in mind while in the field.
Looking for step-by-step instructions on installing BlazeMaster CPVC? Access our free, online training program here.
Storage and Handling
For successful installation, you’ll need to ensure proper care and storage of piping and fittings prior to installation. This means:
- Tip #1: Don’t drag or drop pipe on the job site. Although BlazeMaster CPVC is durable, avoid unnecessary roughness when handling. This reduces the risk of damaging or cracking the pipe and prevents pipe recuts prior to installation.
- Tip #2: Leave pipe and fittings in original packaging until needed and avoid exposing the pipe to direct sunlight for long periods of time. BlazeMaster CPVC packaging is designed to protect it against UV rays.
- Tip #3: Monitor solvent cement storage. Check the date on the bottom of the solvent cement can before applying it to any pipe and fittings. Solvent cement has a shelf life of two years from its production date and should be discarded if not used within this timeframe. Solvent cement should also be stored at 40°- 110°F (4 - 43°C) and away from heat, sources of ignition and extreme cold.
Preparing for Installation
Installers should always review the manufacturer’s specific instructions and take these precautions before installing BlazeMaster CPVC pipe and fittings:
- Tip #4: Wear protective clothing, safety goggles, and gloves. While solvent cement welding is much safer than other installation methods, it’s still a chemical process so skin and eyes should be covered.
- Tip #5: Inspect the pipe before and after cutting. There should be no visible cracks or damage. If damage is present, measure two inches from the end of the crack and recut the pipe. Be sure to also use a clean, dry cloth to wipe away any loose debris or moisture to avoid lengthening cure time and weakening solvent welded connections.
- Tip #6: Take extra precaution in cold weather. BlazeMaster CPVC can be installed in cold temperatures (down to 0°F or -18ºC), however solvent cement gels at cold temperatures, so it will need to be heated to 60°F – 90°F (16ºC – 32ºC) and allowed to sit for 24 hours before application. During application, both pipes and fittings should be at the same temperature, and newly solvent cemented joints should be allowed to cure longer.
During Installation
Best practices during the installation phase ensure that strong, one-piece bonds form between pipes and fittings. When done correctly, the newly-formed joints become the strongest part of the system.
- Tip #7: Check fit of the pipe to its fitting before applying solvent cement. Pipe should go ⅓ inch - ⅔ inch (8.5mm - 17mm) of the way into the fitting. If it is loose or doesn’t fit into the connection, look for deformations or debris. If necessary, use a different pipe or fitting.
- Tip #8: Use an appropriate deburring and chamfering tool to bevel the edge of the pipe. Beveled edges prevent solvent cement from pushing down into the fitting upon insertion. Be sure to turn the chamfering tool in one direction. When deburring the inside of the pipe, make sure to remove all of the little pieces of pipe or they could wash down into sprinkler heads and disrupt water flow.
- Tip #9: Make sure to use the correct dauber size to ensure proper fitting.
- For ¾ inch (19mm) – 1 inch (25mm) pipe, use ½ inch (12.7mm) dauber.
- For 1¼ inch (32mm) – 3 inch (76mm) pipe, use ¾ inch (19mm) dauber
- Tip #10: Use a heavy, even coat of solvent cement to join the pipe and fitting. Dip the dauber into the solvent cement and apply to the outside of the pipe. Remember to not dip the dauber back into the can when applying the remaining solvent cement to the inside of the fitting. If using pipe larger than 1 inch (25mm), a second coat will need to be applied to the pipe before inserting.
- Tip #11: Never re-apply over dried solvent cement. If solvent cement dries, recut the pipe or use a different pipe and fitting.
- Tip #12: Twist and hold pipe while inserting into fitting. A ¼ rotation while the pipe goes into the fitting will ensure even distribution of the joint as it comes together. Hold for 30 seconds and wipe off any excess cement on the pipe’s surface.
- Tip #13: Watch cure times. BlazeMaster CPVC cure times vary based on temperature, humidity, and pipe size. Refer to the manufacturer’s manual for specific times. The BlazeMaster Installation Pocket Guide also provides general time suggestions, but shouldn’t replace manufacturer instructions.
- Tip #14: Implement proper practices for hangers and supports. Take special care for hanger spacing between sprinkler head drops (refer to manufacturer’s manual). Proper bracing is critical to ensure that water pressure does not force sprinkler heads up through the ceiling.
- Tip #15: Attach sprinkler heads after the adapter is solvent welded to the pipe. To learn more about installing sprinkler heads, check out our blog post on the new Tyco Rapid Seal Sprinkler Head Adapter.
BlazeMaster CPVC Installation Resources
Looking for more information to ensure proper installation of your BlazeMaster fire protection system?
Check out these additional resources:
- Free Online Training Program: The course can be completed at your own pace and covers a variety of topics including installation best practices, cutting and joining, listings and approvals, chemical compatibility, health, safety and more.
- BlazeMaster Installation Pocket Guide
- BlazeMaster Fire Sprinkler System Installation Video
Additionally, when you choose to work with BlazeMaster Fire Protection Systems, you’ll have access to our team of product experts who can provide technical support, on-site training and demonstrations, failure analysis, and more for the lifespan of your system.
Schedule a free consultation today.